
Keeping some pretty basic materials and focusing more on the design itself as well as the lighting & composition, Michael Tschernjajew, a 3d artist based in Germany who loves sci-fi scenes and whatever is related to technology, drives us through his simple 3D techniques when he works on personal projects. Enjoy the article!
About me.
My name is Michael Tschernjajew and I am an industrial designer from northern Germany. I work as a freelance 3D artist since 2005 and I am also an art director for 3D Stuff in a big Agency here in Germany.
I mostly do product viz but in the last 4 years, I also got the chance to peak into movie-related stuff of some really big productions, which was a great and challenging opportunity for me. As most of my work is under NDA, I am doing some free-time projects for myself to expand my portfolio with work that I am able to share. Today, I'm going to share in this article one of these projects.
About The Project.
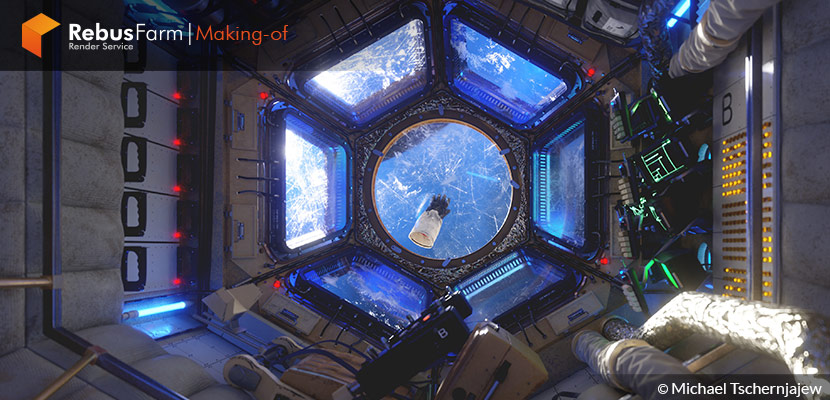
More than a year ago I decided to do a science fiction-related project which should include some homages to iconic movies like the work from Kubrick or the first Alien Movie.
I am also fascinated by the early NASA days of the Apollo Program or Cold War Technology. I like very much the aesthetics of this old analog tech. As well as nowadays International Space Station.
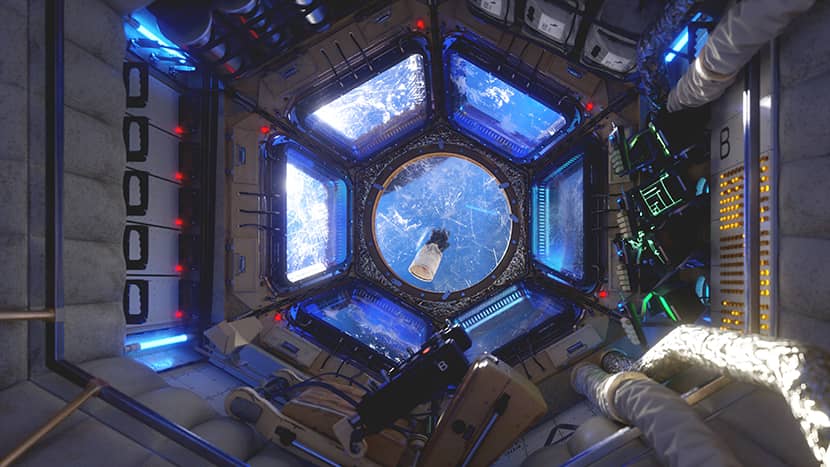
So my idea, roughly, was to create a space station with some elements and designs from the mentioned above. I also wanted to salvage some of my own projects which I did before because I thought they would make a great fit. I had the idea of doing an animation, just like a flythrough from a few different angles and positions, as well.
Software & Assets Used.
My main weapons of choice are the latest Cinema4D and Octane Render version. I love Octane Render for its quality, speed and its user interface look. Cinema4D is my main ( and only ) 3D app since I started with 3D, in 1999 (with version 4.0 on an old Mac Clone). I have some little helpers like Crazybump or from time to time I use Blender as a Sidekick.
Modeling & Scene Setup.
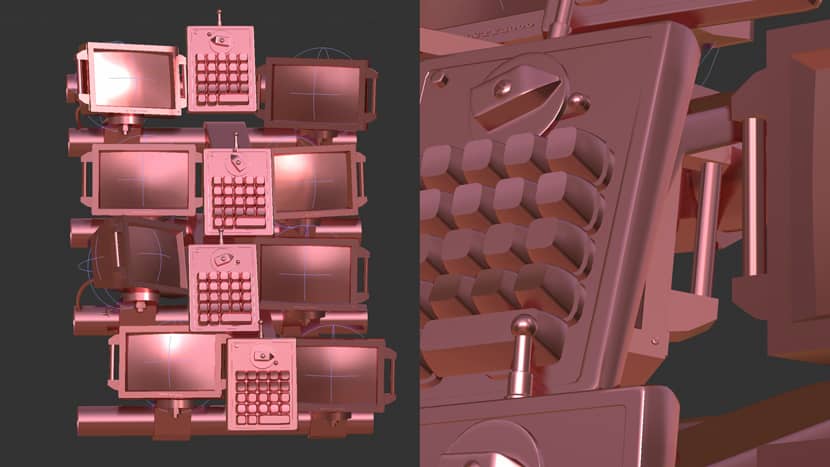
I won’t go into modeling techniques, as everything is pretty straightforward and nothing fancy at all. Just some good old poly modeling.
I like to keep my geometry clean, nice, and highly detailed – thinking of rendering and doing details in the end. This is a tidy process but it will give you the availability to do close-up renderings in the end.
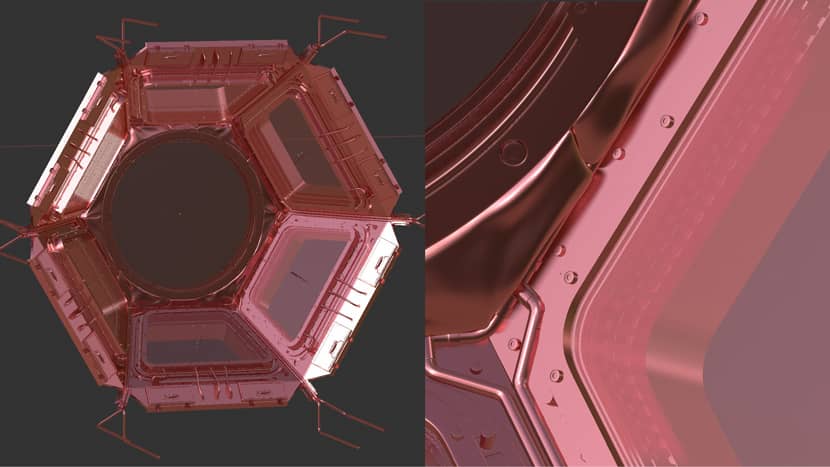
Except for the glove which floats outside, and the bags on the wall, everything is modeled by myself. There are some buttons and switches which I kitbashed out of my own projects.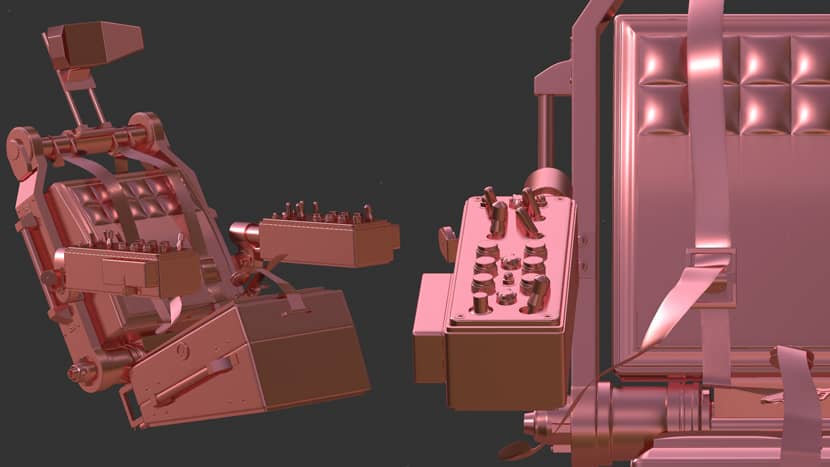
During scene arrangement, even in the early stages, I like to set up some cameras which later could be my final shots.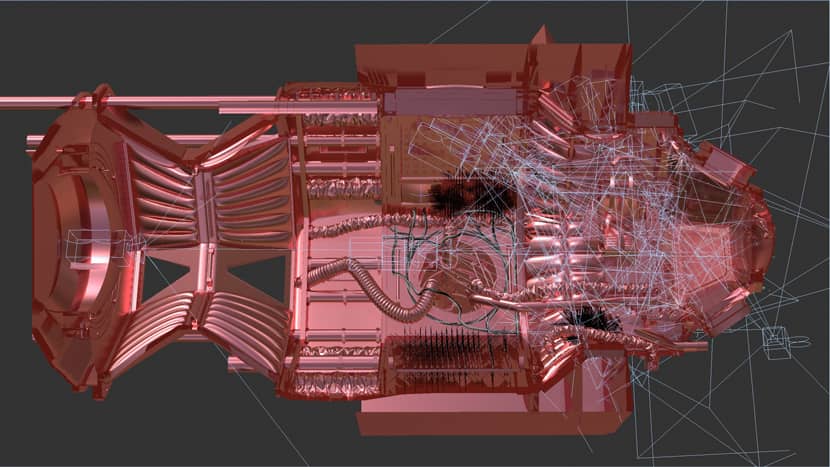
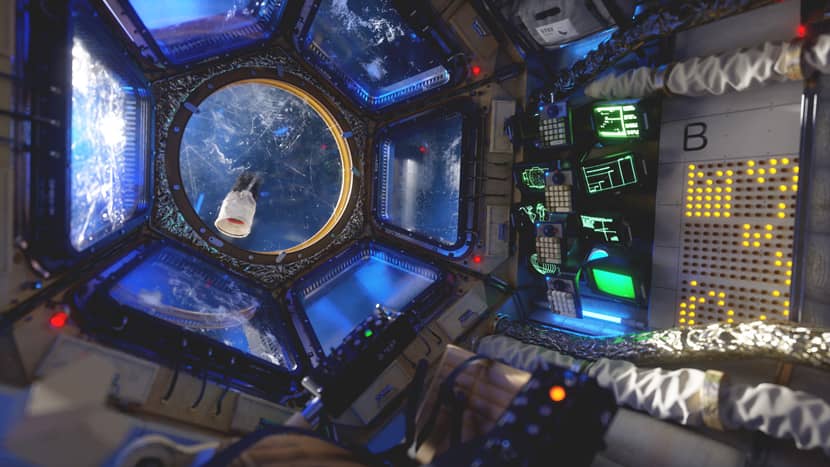
After getting all the bits and pieces together the scene became actually really complex. As I wanted to do an animation as well, I thought it would be nice to have some blinking lights and things happening on the screens, rather than have everything static. These emissive materials could be used to light the scene, too.
I used Cinema4D’s Mograph with Fields and an animated noise shader to set up a random „on/off“ animation within the clones, which worked pretty great.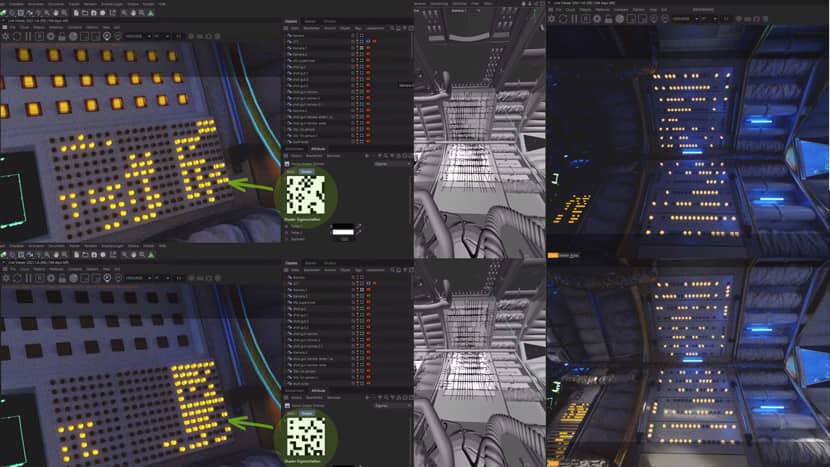
On the screens, there are some really basic animations, which I made in After Effects and which were then loaded into the octane materials.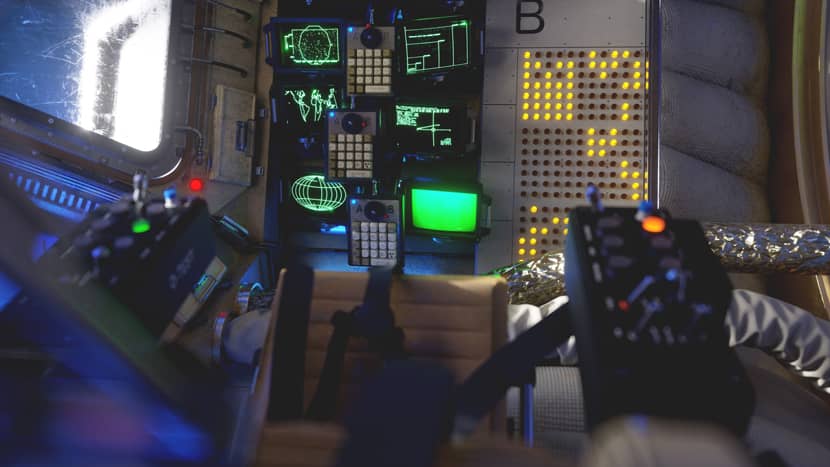
Lighting Setup & Materials.
At first glance, I was happy with how it turned out by just using the emissive materials from the buttons, but somehow I wanted a more dramatic feeling.
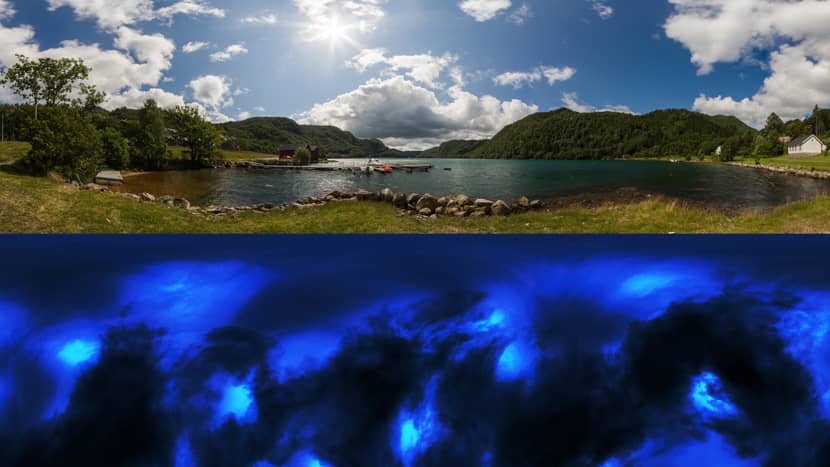
I tried out a few different things with area lights or sun outside but ended up using a daylight HDRI from „JorgenHDRI“ for lighting and „Space Nebula“ 360 from the Artstation shop as a visible environment.
Plus I made a basic opening animation for the cupola windows which looks nice on a flythrough and even in the stills, as it gives me a variation in lighting by just scrolling through the timeline.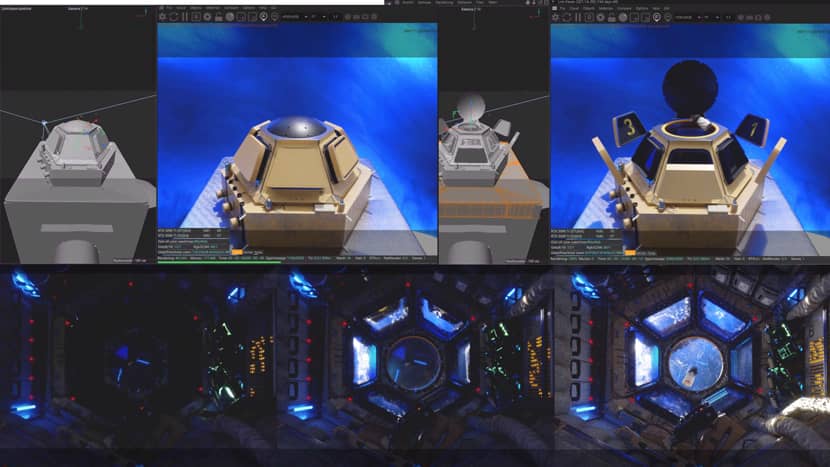
The final lighting is a mix of the HDRIs and all the lights from the buttons and indirect lights on the inner parts of the space station. As there is a random light movement on the buttons and screens, it s very easy to get some shots together which differ from each other which is really great for the final images.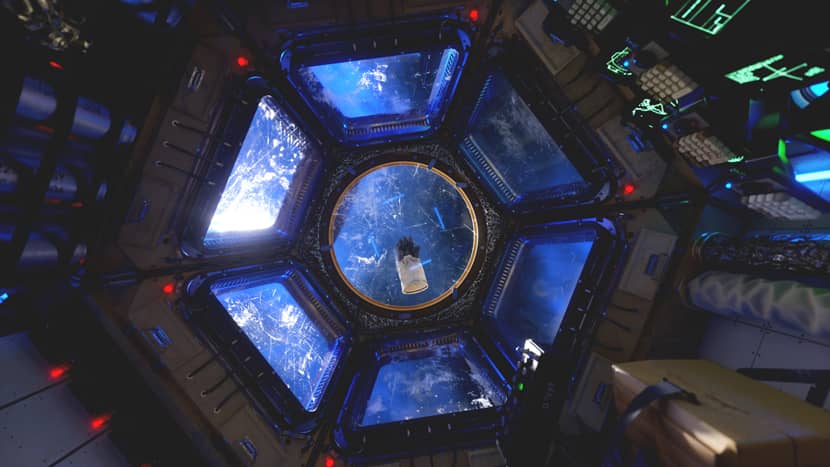
My Materials are, I would say, pretty basic - I am not the one who’s into deep material editing as I like to focus more on the design itself and on the composition of the project as well as lighting.
But to give you a glimpse of my materials, I mostly use textures from Ambientcg with a combination of a lot of imperfections. Resulting in many many materials but also getting the result in the end. Imperfections give you nice results, especially on glass materials in combination with some lighting effects.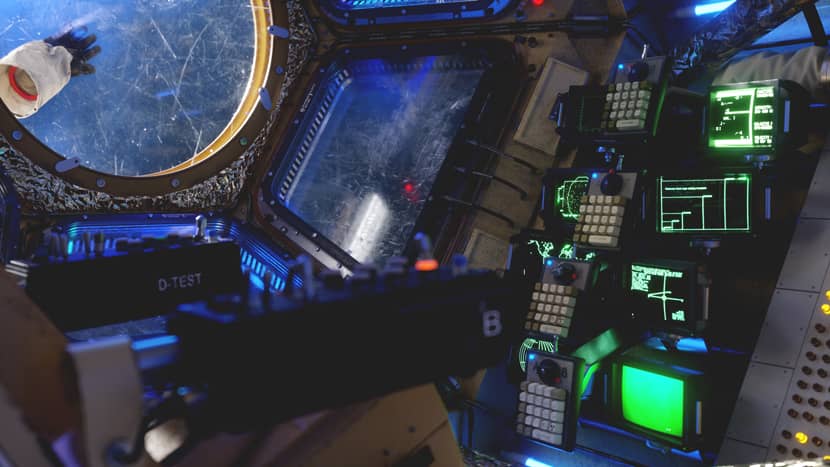
Rendering & Final Output.
I kept most of my cameras which I set up in the early stages of the project. I also made some more, which were good for some closeup shots, as I did some details as well.
I like to use depth of field and love to play around with the focus of the camera. Having made a good model and scene comes in handy here as well as hi-res materials.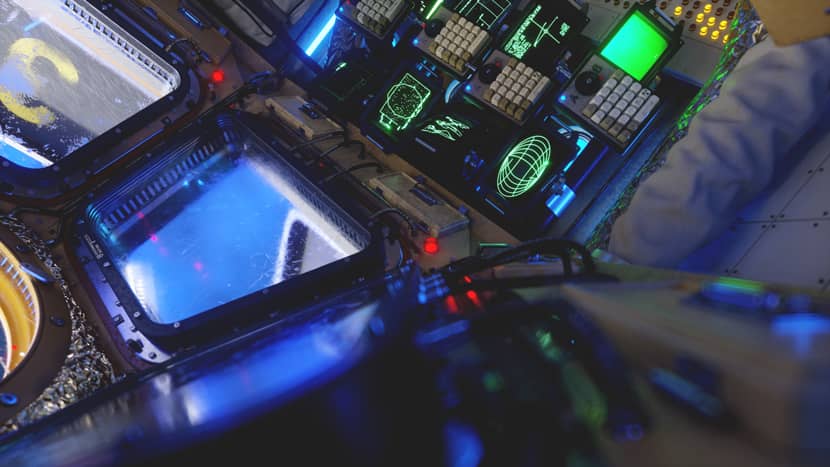

Summary.
Finally, I would like to thank both RebusFarm and VWArtclub for giving me the wonderful opportunity to write the making-of article and show everyone how I created this scene.
That’s it, I hope you found some useful tips through my workflow and if you have questions feel free to knock me out using the links below. Thanks again & Keep Rendering!
Kind regards,
Michael Tschernjajew.
Check more of Michael's work on these channels:
Want to share your work with our community too?
Contact us at Этот адрес электронной почты защищён от спам-ботов. У вас должен быть включен JavaScript для просмотра. and tell us about your favorite project.